Category
Popular
-
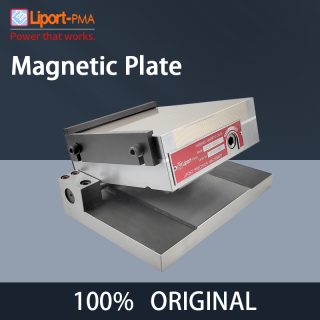
 Magnetic Sine Plate Machinist
$ 650 – $ 780
-
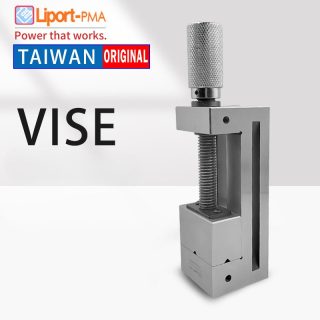
 Premium Precision Grinding Vise/CNC Vise
$ 111 – $ 402
-
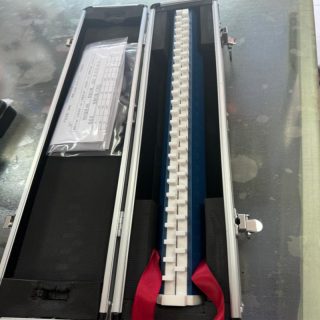
 Customized Ceramic Step Gauge
-
 Magnetic Base Stand Holder
$ 55 – $ 118
-
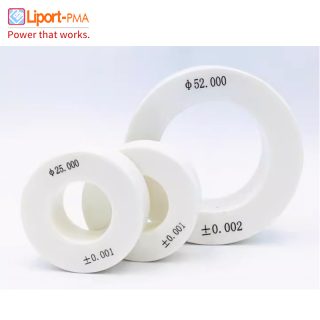
 Ceramic Ring Gauge (Imperial/Metric)
Tag Clouds
Customized case of ceramic gauge block
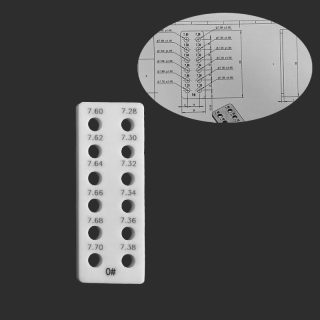
We provide customized gauge blocks and calibration blocks of various shapes and non-standard types, with accuracy of up to 0.002mm (2 μ m), 0.001mm (1 μ m), and 0.0005mm (0.5 μ m).
If there’s anything needed, please contact us.
The above display cases do not involve trade secrets. If you have confidentiality requirements, we can sign a confidentiality agreement. At that time, we will not display your product information to anyone

Customized case of ceramic gauge block
1、 Customer demand backgroun
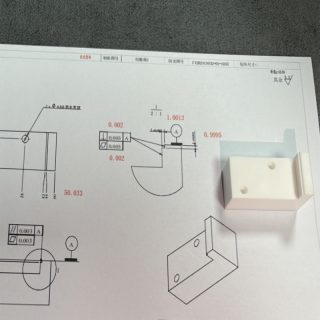
Recently, we received a customized request from a precision manufacturing client in Croatia. The customer requires a specific size ceramic gauge for their high-precision measurement process. The specific customization requirements are as follows:
Size specification: The overall size of the gauge is 120mm * 14mm * 14mm, with a rectangular shape.
Standard surface requirement: Specify one 120mm * 14mm surface as the standard surface (zero point surface) among the six faces of the rectangular prism. This surface requires extremely high precision, with the following specific requirements:
Flatness: ± 0.001mm.
Length: ± 0.001mm.
Width: ± 0.001mm.
2、 Customized solution and processing flow
Material selection and pretreatment
Selecting high-quality alumina ceramic materials, due to their excellent wear resistance, hardness, and thermal stability, is very suitable for manufacturing high-precision measuring tools.
Strictly screen the raw materials to ensure the absence of defects such as cracks and pores, in order to guarantee the stability and accuracy of the final product.
Precision Design and Machining
According to customer requirements, high-precision CNC machine tools are used for processing, and the temperature, humidity, and vibration during the processing are strictly controlled to avoid affecting the accuracy.
For the standard surface, ultra precision grinding technology is adopted, and through multiple iterations of processing, the precision gradually approaches the design requirements.
Accuracy detection and adjustment
After processing, high-precision measuring equipment such as laser interferometers and optical plane interferometers are first used for preliminary testing to ensure that all indicators are close to customer requirements.
Based on the preliminary test results, fine tune the parts that do not meet the requirements until all indicators meet or exceed the customer’s accuracy requirements.
Final inspection and packaging
Use the customer specified Sanfeng radian meter and ten thousand feet for final inspection to ensure that the flatness, length, and width of the standard surface are within ± 0.0005mm.
Record and issue detailed inspection reports for customer review.
Accurately package qualified products to ensure they are not damaged during transportation.
3、 Product delivery and customer feedback
After strict processing and inspection procedures, we have successfully customized ceramic gauges that meet the requirements of our Croatian customers.
Deliver the product to the customer on time.
The customer is highly satisfied with the accuracy and quality of the product, believing that the gauge greatly improves the measurement accuracy and efficiency in its production process. At the same time, our clients have highly praised our professional capabilities and service level.
4、 Summary and Prospect
This customized case of ceramic gauges not only demonstrates our professional ability and technical level in high-precision ceramic product manufacturing, but also further consolidates our competitiveness in the international market. In the future, we will continue to be committed to technological innovation and service optimization, providing customers with more high-quality and high-precision customized solutions to meet the global demand for precision manufacturing.
Related products
-
Imperial / Metric Ceramic GO/NO GO Plug Gauge
Read more1、We offer metric, imperial, and various sizes of Ceramic GO/NO GO plug gauges.
2. About Customization:
1) We provide metric and imperial GO/NO GO plug gauges, with diameters ranging from 1mm-200mm (within 8 inches)
2) The customized precision for metric systems can be ± 2 μ m/± 1 μ m/± 0.5 /± 0.25μ m, and the customized precision for imperial systems can be class zz/class z/class y/class x/class xx/class xxx.If needed, please contact our customer service.
Liport-PMA Original
-
Customized High precision special-shaped fixture
Read moreWe provide customized High precision special-shaped fixture, with accuracy of up to 0.002mm (2 μ m), 0.001mm (1 μ m), and 0.0005mm (0.5 μ m).
If there’s anything needed, please contact us.The above display cases do not involve trade secrets. If you have confidentiality requirements, we can sign a confidentiality agreement. At that time, we will not display your product information to anyone
-
Customized Gauge Blocks/Customized ceramic fixtures
Read moreWe provide customized gauge blocks and calibration blocks of various shapes and non-standard types, with accuracy of up to 0.002mm (2 μ m), 0.001mm (1 μ m), and 0.0005mm (0.5 μ m).
If there’s anything needed, please contact us.The above display cases do not involve trade secrets. If you have confidentiality requirements, we can sign a confidentiality agreement. At that time, we will not display your product information to anyone
-
Customized Gauge
Read moreWe provide customized gauge blocks and calibration blocks of various shapes and non-standard types, with accuracy of up to 0.002mm (2 μ m), 0.001mm (1 μ m), and 0.0005mm (0.5 μ m).
If there’s anything needed, please contact us.The above display cases do not involve trade secrets. If you have confidentiality requirements, we can sign a confidentiality agreement. At that time, we will not display your product information to anyone
Best offers
Original Guaranteed
100% Safe
Secure Shopping
24x7 Support
Online 24 hours
Best Offers
Grab Now
Free Shiping
On all order over
Know Us

Our company founded in 2012, we specialize in the development and production of precision tools and measuring instruments under the brand name Liport-PMA. We provide customized solutions for electronics, machinery, medical, aerospace, and other industries, backed by extensive product experience and a skilled technical team. We look forward to collaborating with you for a brighter future.
Read More
